Exterior foam trim molding has revolutionized modern construction by offering a lightweight, durable, and cost-effective alternative to traditional wood, PVC, or fiber cement trim.
Whether used for crown molding, window surrounds, door casings, or decorative accents, foam trim provides excellent insulation, moisture resistance, and design flexibility.
What is Exterior Foam Trim Molding?
Exterior foam trim molding is made from expanded polystyrene (EPS) or polyurethane foam, engineered to mimic traditional wood trim while offering superior durability and weather resistance.
How to make Exterior Foam Trim Molding
Exterior foam trim molding offers an excellent alternative to traditional wood trim, providing weather resistance, lightweight properties, and design flexibility.
While pre-made foam trim is widely available, making your own allows for custom designs, cost savings, and creative control.
This guide will walk you through the entire process of creating durable, professional-grade foam trim molding for your home’s exterior.
Materials and Tools Needed
Materials:
- High-density EPS (Expanded Polystyrene) foam (2-4 lb density recommended)
- Polyurethane foam (for more intricate designs)
- Exterior-grade adhesive (PL Premium, Liquid Nails Foamboard)
- Paintable acrylic or polyurethane sealant
- Exterior-grade acrylic latex paint
- Primer (for better paint adhesion)
Tools:
- Hot wire foam cutter (for smooth cuts)
- Utility knife or fine-tooth saw
- Sandpaper (80-120 grit for smoothing)
- Measuring tape & straightedge
- Caulk gun
- Paintbrushes or spray gun
Choosing the Right Foam for Exterior Trim
| Foam Type | Best For | Pros | Cons |
|---|---|---|---|
| EPS Foam | Simple profiles, budget projects | Lightweight, easy to cut | Less durable than polyurethane |
| Polyurethane Foam | High-end, detailed trim | Stronger, impact-resistant | More expensive |
| XPS Foam (Extruded Polystyrene) | Structural reinforcement | Moisture-resistant | Harder to shape |
Step-by-Step Manufacturing Process
Step 1: Design Your Trim Profile
- Sketch your desired trim shape (e.g., crown molding, window casing).
- Use CAD software or a template for precision.
Step 2: Cut the Foam to Size
- Measure and mark foam blocks.
- Use a hot wire cutter for clean, smooth edges (or a fine-tooth saw).
Step 3: Shape the Foam
- For ornate designs, use a Dremel tool or sandpaper.
- For straight edges, a table saw or hand plane works well.
Step 4: Seal the Foam
- Apply an exterior-grade primer to protect against UV rays and moisture.
- Let dry completely before painting.
Cutting and Shaping Techniques
- Hot Wire Cutting: Best for smooth, precise cuts (ideal for straight edges).
- Hand Carving: Useful for custom designs (use sharp knives and sandpaper).
- CNC Routing: For professional-grade, repeatable patterns (requires machinery).
Surface Finishing and Detailing
- Sanding: Use 80-120 grit sandpaper to smooth rough edges.
- Texturing: Add wood-grain effects with a wire brush or specialized tools.
- Sealing: Apply water-based polyurethane for extra durability.
Painting and Weatherproofing
- Prime First – Use an acrylic-based primer for better adhesion.
- Paint – Apply 100% acrylic latex paint (best for flexibility).
- Seal – Use a UV-resistant clear coat for long-lasting protection.
Installation Tips for Exterior Use
- Use exterior-grade adhesive (PL Premium or Liquid Nails Foamboard).
- Secure with stainless steel screws or nails (avoid rust).
- Caulk all seams with paintable exterior sealant.
- Allow for expansion gaps (foam expands slightly in heat).
- EPS Foam Trim: Molded from expanded polystyrene beads, lightweight and easy to cut.
- Polyurethane Foam Trim: Denser, more impact-resistant, and often used for high-end applications.
Benefits of Foam Trim Molding Over Traditional Materials
| Feature | Foam Trim | Wood Trim | PVC Trim | Fiber Cement |
|---|---|---|---|---|
| Weight | Very Light | Heavy | Light | Heavy |
| Moisture Resistance | Excellent | Poor (rots) | Good | Good |
| Termite Proof | Yes | No | Yes | Yes |
| Insulation | High | Low | Medium | Low |
| Installation Ease | Very Easy | Moderate | Easy | Difficult |
| Cost | Affordable | Expensive | Moderate | High |
Why Choose Foam Trim?
Foam trim has revolutionized exterior and interior molding with its unique combination of durability, affordability, and design flexibility.
Unlike traditional wood, PVC, or fiber cement trim, foam trim offers superior weather resistance, effortless installation, and long-term performance – all while costing 30-50% less than premium wood alternatives.
Benefit #1: Lightweight & Easy to Install
Why It Matters:
- 50-75% lighter than wood – No heavy lifting or structural reinforcements needed
- Cuts with basic tools – Shape with a utility knife or hot wire cutter (no specialty saws required)
- Adhesive-friendly – Bonds securely with construction adhesives (fewer nails/screws)
Benefit #2: Superior Moisture & Rot Resistance
Key Advantages:
Zero water absorption – Won’t swell or degrade like wood
Mold/mildew resistant – Ideal for humid climates and coastal areas
No seasonal warping – Maintains shape in -30°F to 150°F temperatures
Benefit #3: Excellent Insulation Properties
Foam trim provides continuous insulation that traditional materials can’t match:
| Material | R-Value per Inch | Thermal Bridging Risk |
|---|---|---|
| Foam Trim | R-3.5 to R-5 | None |
| Wood | R-1.25 | High |
| PVC | R-1 | Moderate |
Benefit #4: No Warping or Cracking
Unlike wood that expands/contracts with humidity changes, foam trim:
- Maintains dimensional stability (±0.1% size change)
- No nail pops or seam separation
- Holds paint better – Fewer touch-ups needed
Benefit #5: Pest & Termite Proof
Foam trim eliminates common wood problems:
- No food source for termites, carpenter ants, or wood-boring beetles
- No chemical treatments required (unlike pressure-treated wood)
- Deterioration-proof – Won’t attract fungi or microorganisms
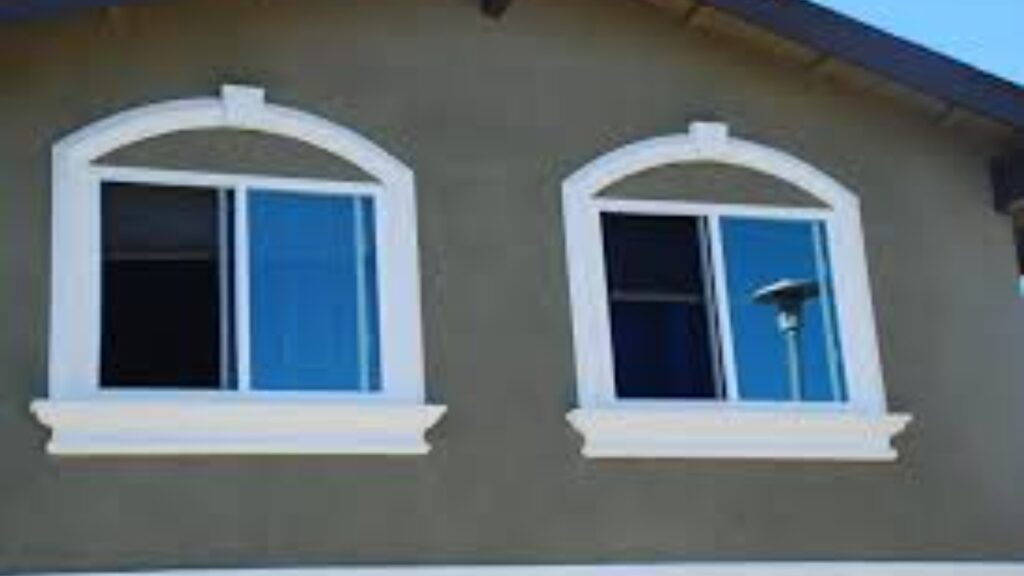
Benefit #6: Design Versatility
From classic to contemporary, foam trim offers:
- Intricate profiles – Replicates Victorian, Colonial, or Craftsman styles
- Custom shapes – CNC-routable for unique designs
- Seamless joints – Easier to caulk than wood/PVC
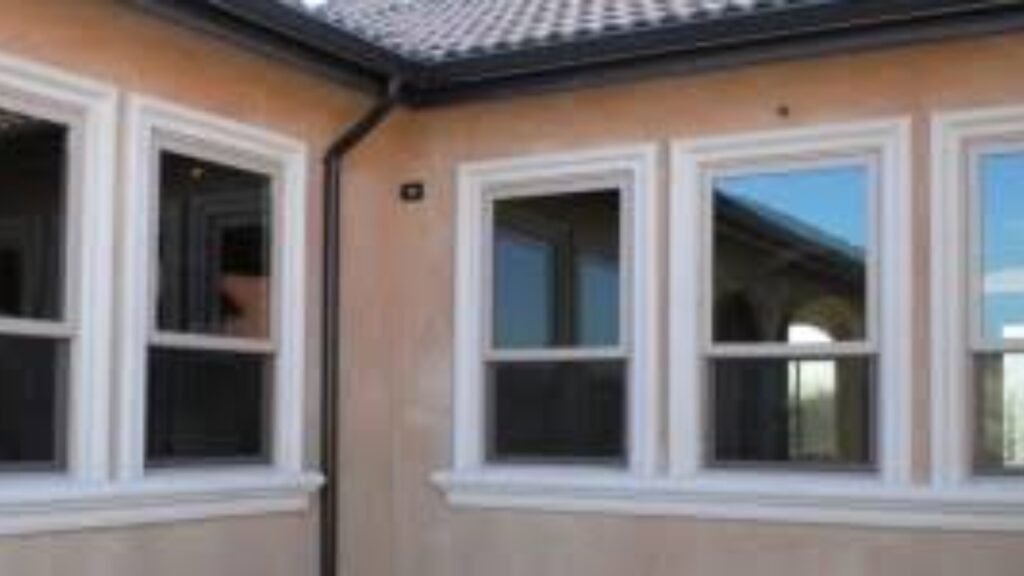
Popular Applications:
- Crown molding (up to 12″ wide)
- Window/door casings
- Wainscoting and paneling
- Decorative columns and corbels
Benefit #7: Cost-Effective Solution
Price Comparison (Per Linear Foot)
| Material | Material Cost | Installation Cost | Lifetime Maintenance |
|---|---|---|---|
| Foam Trim | $1.50-$4.00 | $1.00-$2.00 | Minimal |
| Wood | $3.00-$8.00 | $2.00-$4.00 | High |
| PVC | $2.50-$6.00 | $1.50-$3.00 | Moderate |
Foam Trim vs Traditional Materials
| Feature | Foam Trim | Wood | PVC | Fiber Cement |
|---|---|---|---|---|
| Weight | ★★★★★ | ★★☆☆☆ | ★★★☆☆ | ★☆☆☆☆ |
| Moisture Resistance | ★★★★★ | ★★☆☆☆ | ★★★★☆ | ★★★★☆ |
| Insulation | ★★★★★ | ★★☆☆☆ | ★★☆☆☆ | ★☆☆☆☆ |
| Paint Adhesion | ★★★★☆ | ★★★★★ | ★★★☆☆ | ★★★☆☆ |
| Cost | ★★★★★ | ★★☆☆☆ | ★★★☆☆ | ★★☆☆☆ |
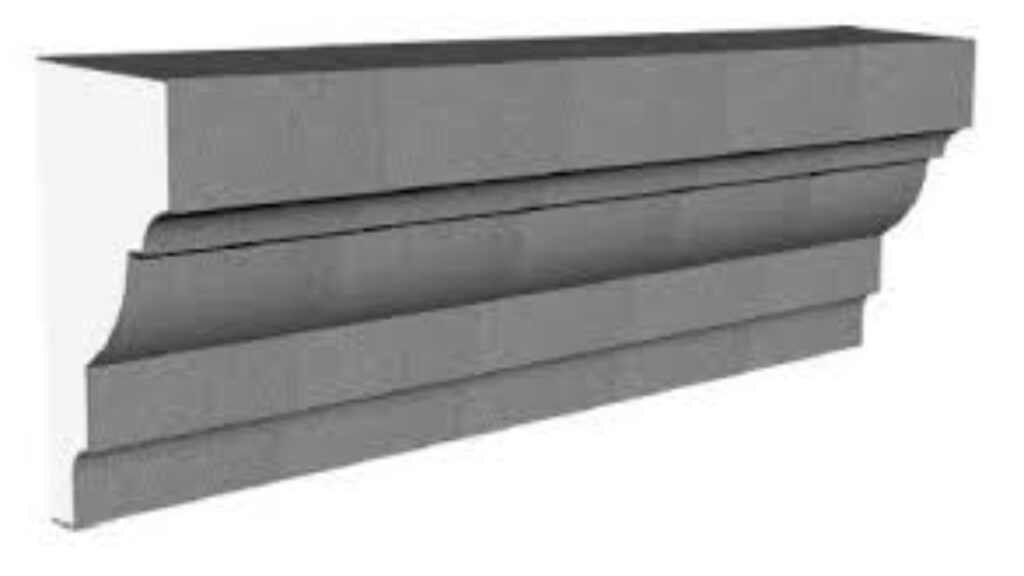
Types of Exterior Foam Trim Molding
Exterior foam trim molding has become a popular alternative to traditional wood trim due to its lightweight nature, durability, and resistance to moisture and insects.
Available in various materials and styles, foam trim offers excellent insulation properties and can mimic the look of more expensive materials like wood or stone.
EPS Foam Trim Molding
Expanded Polystyrene (EPS) foam is the most common and affordable type of foam trim.
Key Features:
- Lightweight – Easy to handle and install
- Moisture-resistant – Won’t rot or warp
- Cost-effective – Cheaper than wood or polyurethane
- Good insulation – Helps improve energy efficiency
Best For:
✔ Window and door casings
✔ Simple crown molding
✔ Baseboards and corner trim
Limitations:
- Less durable than polyurethane
- Can dent or crack under impact
Polyurethane Foam Trim Molding
Polyurethane foam trim is denser and more durable than EPS, making it ideal for high-end applications.
Key Features:
- High durability – Resistant to impacts and harsh weather
- Detailed designs – Can replicate intricate wood carvings
- Paintable – Holds paint well for a seamless finish
- Long lifespan – Lasts 20+ years with proper care
Best For:
✔ Ornate crown molding
✔ Columns and pilasters
✔ Decorative gables and arches
Limitations:
- More expensive than EPS
- Heavier, requiring stronger adhesives
XPS Foam Trim Molding
Extruded Polystyrene (XPS) foam is denser than EPS and offers better moisture resistance.
Key Features:
- High moisture resistance – Ideal for humid climates
- Stronger than EPS – Less prone to damage
- Smooth surface – Easier to paint and finish
Best For:
✔ Coastal homes (resistant to salt air)
✔ Areas with heavy rainfall
✔ Structural reinforcement
Limitations:
- Harder to shape than EPS
- More expensive
Composite Foam Trim Molding
Composite foam trim combines foam with other materials (like fiberglass or PVC) for enhanced durability.
Key Features:
- Extreme durability – Resists cracking and fading
- UV-resistant – Won’t degrade in sunlight
- Low maintenance – Doesn’t require frequent repainting
Best For:
✔ High-traffic commercial buildings
✔ Modern architectural designs
✔ Extreme weather conditions
Limitations:
- Highest cost among foam trims
- Limited design flexibility
Decorative Foam Trim Styles
Foam trim comes in various styles to match architectural designs:
| Style | Description | Best Use |
|---|---|---|
| Crown Molding | Elegant ceiling/wall transition | Living rooms, porches |
| Window & Door Casings | Framing for openings | Traditional homes |
| Baseboard Trim | Covers wall-floor joints | Modern interiors |
| Columns & Pilasters | Decorative pillars | Entryways, facades |
| Gable & Soffit Trim | Roof and eave detailing | Exterior accents |
Comparing Foam Trim Materials
| Feature | EPS Foam | Polyurethane | XPS Foam | Composite |
|---|---|---|---|---|
| Cost | $ | $$ | $$ | $$$ |
| Durability | Medium | High | High | Very High |
| Moisture Resistance | Good | Excellent | Excellent | Best |
| Weight | Light | Medium | Medium | Heavy |
| Design Flexibility | High | Very High | Medium | Low |
Best Applications for Each Type
- EPS Foam: Budget-friendly residential projects
- Polyurethane: High-end homes with ornate details
- XPS Foam: Wet climates, coastal properties
- Composite: Commercial buildings, extreme weather
Installation Considerations
- Use exterior-grade adhesive (PL Premium recommended)
- Seal all joints with paintable caulk
- Prime before painting for best results
Maintenance and Durability
- EPS & Polyurethane: Lasts 15-25 years
- XPS & Composite: 25+ years with minimal upkeep
Applications of Foam Trim Molding in Construction
- Residential Homes – Gables, porches, and fascia boards.
- Commercial Buildings – Lightweight yet durable for large structures.
- Historic Renovations – Replicates vintage woodwork without maintenance issues.
How to Install Exterior Foam Trim Molding
Tools Needed:
- Foam adhesive (PL Premium, Liquid Nails)
- Galvanized nails or screws
- Caulk gun & exterior-grade sealant
- Fine-tooth saw or hot knife
Step-by-Step Guide:
- Measure & Cut – Use a sharp blade for clean edges.
- Apply Adhesive – Use a strong construction adhesive.
- Secure with Fasteners – Nail or screw into place.
- Seal Joints – Apply paintable caulk for a seamless look.
Maintenance and Durability
- Cleaning: Mild soap & water.
- Repairs: Small cracks can be filled with exterior caulk.
- Lifespan: 20+ years with proper installation.
Cost Comparison
| Material | Cost per Linear Foot |
|---|---|
| Foam Trim | $1.50 – $4.00 |
| Wood Trim | $3.00 – $8.00 |
| PVC Trim | $2.50 – $6.00 |
| Fiber Cement | $4.00 – $10.00 |
Conclusion
Exterior foam trim molding is the modern, cost-effective, and low-maintenance alternative to traditional materials.