Decorative wall molding, often called millwork or trim, is the secret weapon of interior designers and architects for creating character-rich spaces.
Far from being a relic of old-world mansions, molding is incredibly versatile.
It can be traditional or minimalist, bold or subtle, and it remains one of the most cost-effective ways to elevate your home’s aesthetic.
What is Decorative Wall Molding?
Decorative wall molding is an umbrella term for any strip of material (most often wood, plaster, or MDF) that is applied to walls, ceilings, and doors to create raised, decorative patterns and profiles. Think of it as “architectural jewelry” for your home.
Its primary purpose is to add visual interest, character, and a sense of elegance and structure to a room.
The Different Types of Decorative Wall Molding
While the terms are often used interchangeably, there are specific types, each with a traditional place and purpose:
- Chair Rail:
- What it is: A horizontal molding installed on the wall, typically at the height of a chair back (around 30-36 inches from the floor).
- Original Purpose: To protect the wall from being damaged by chairs.
- Modern Use: Primarily decorative. It beautifully divides a wall, allowing for two different paint colors or wallpapers (e.g., a wainscoting panel below and a solid color above).
- Wainscoting:
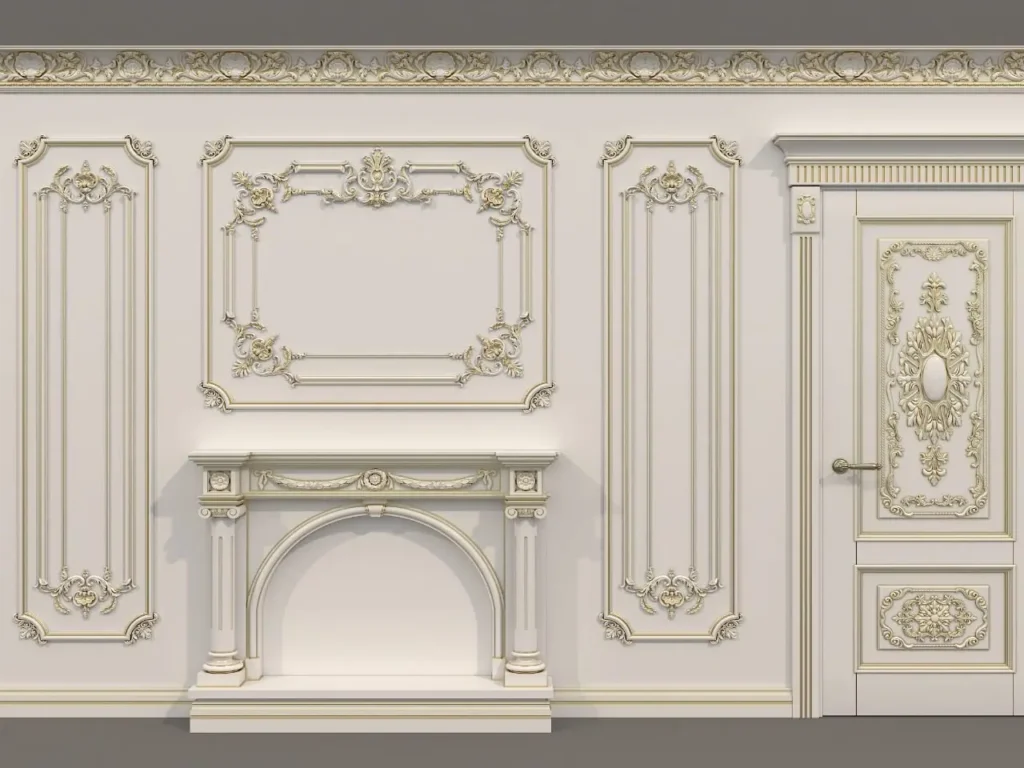
- What it is: This isn’t a single molding but a system of wall paneling that covers the lower portion of an interior wall. It often uses other moldings like chair rails and baseboards to create its structure.
- Purpose: Adds substantial texture, depth, and a classic, formal feel to a room. It also provides durable protection for the lower part of the wall.
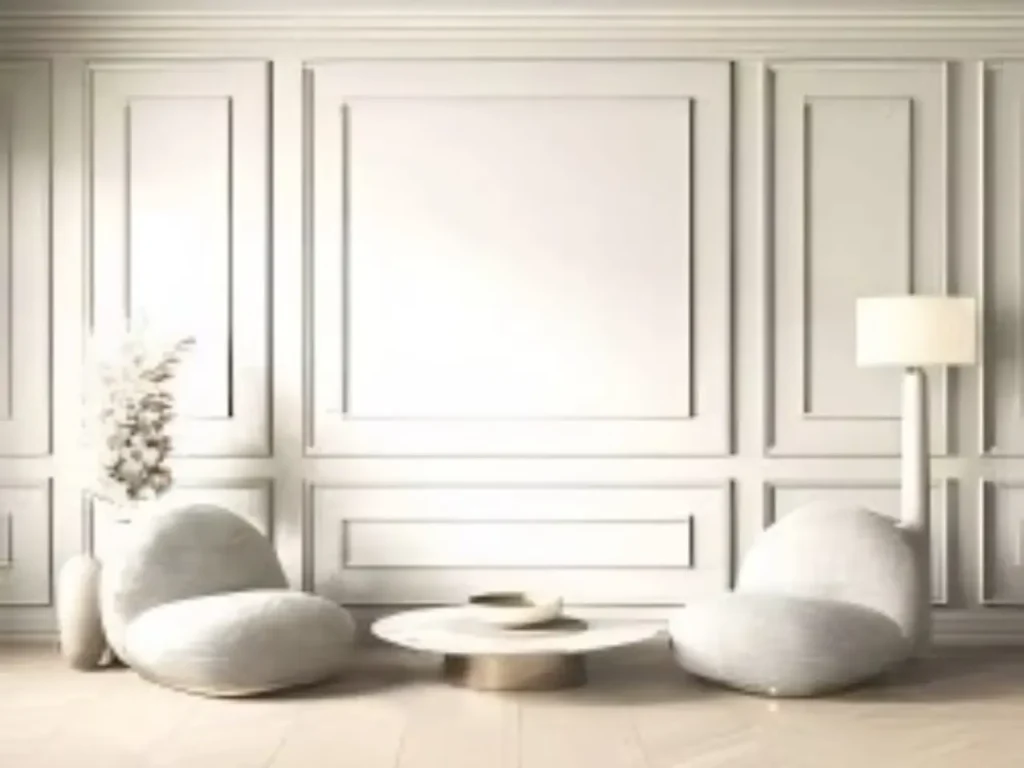
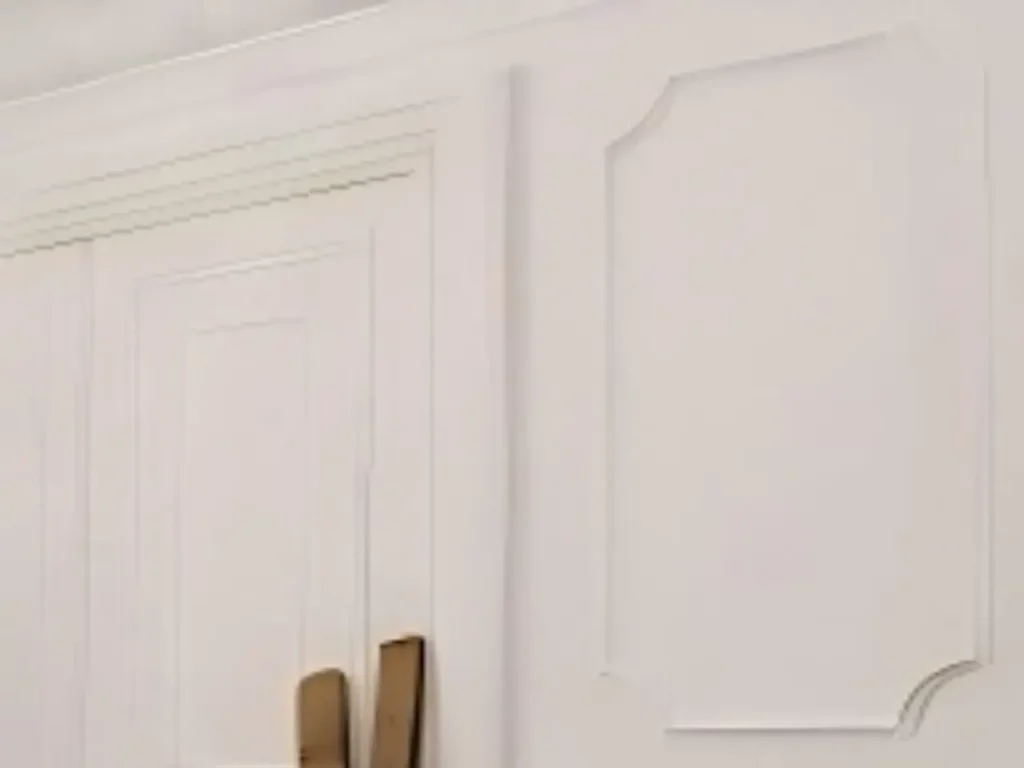
- Picture Frame Molding (or Panel Molding):
- What it is: Thin, decorative strips of molding used to create rectangular or square “frames” directly on the wall.
- Purpose: To create a sophisticated, paneled look without the full commitment of wainscoting. It draws the eye upward and makes rooms feel more refined and custom-built. It’s a key element in creating a feature wall.
- Crown Molding (or Cornice):
- What it is: Molding that is installed in the seam where the wall meets the ceiling.
- Purpose: To create a graceful transition between the wall and ceiling. It adds grandeur, can make ceilings appear higher, and gives a room a finished, polished look.
- Baseboards (or Skirting Boards):
- What it is: The molding that runs along the bottom of the wall, where it meets the floor.
- Purpose: To cover the joint between the wall and the floor, protecting the wall from kicks, vacuums, and furniture. It also provides a clean, finished edge to the room.
Why is it So Popular?
- Adds Character & Architecture: It instantly elevates a plain, builder-grade box of a room into something with personality and history.
- Creates Visual Interest: It breaks up large, blank walls with shadows, lines, and patterns.
- Defines Style: Depending on the profile and complexity, molding can complement various styles—from ornate and traditional to clean-lined and modern.
- Can Manipulate Perception: Strategic use of molding can make a room feel taller (vertical panels), wider (horizontal lines), or more proportional.
- Increases Home Value: It’s seen as a desirable, high-end feature that can make your home more attractive to potential buyers.
What is it Made From?
- Wood: The classic choice (like pine or poplar). It can be stained or painted and has a beautiful, solid feel. It’s also the most work to install.
- MDF (Medium-Density Fiberboard): The most popular modern choice. It’s affordable, smooth, easy to cut, and comes pre-primed. It’s intended to be painted.
- Polyurethane/Polystyrene: Lightweight foam options. Excellent for intricate, ornate patterns (like heavy crown molding) because they are easy to install and very affordable. Must be painted.
A Glossary of Common Decorative Wall Molding
1. Baseboard (or Skirting Board)
- What it is: The molding that runs along the very bottom of the wall, covering the joint where the wall meets the floor.
- Traditional Purpose: To protect the wall from damage from kicks, vacuums, and furniture, and to hide uneven gaps between the wall and floor.
- Modern Use: Still primarily functional, but the profile and height are major style choices. Taller baseboards (5-7 inches or more) add a sense of grandeur and proportion to a room.
2. Base Cap
- What it is: A decorative molding that is attached to the top of a simple baseboard.
- Purpose: To add a more complex and elegant profile to a basic baseboard, creating a more custom and finished look without replacing the entire piece.
3. Shoe Molding (or Quarter Round)
- What it is: A small, concave molding that is tucked in at the bottom of the baseboard, against the floor.
- Purpose: To cover any remaining gaps between the installed baseboard and the floor, creating a clean transition. It is especially useful on uneven floors.
4. Wainscot Cap
- What it is: The top, horizontal molding of a wainscoting system. It often has a pronounced “shelf” or decorative profile.
- Purpose: To serve as the finishing cap for the wainscoting panels below, providing a ledge and a decorative transition to the upper wall. It is typically more decorative than a standard chair rail.
5. Chair Rail
- What it is: A horizontal molding installed on the wall, traditionally at the height of a chair back (around 30-36 inches from the floor).
- Traditional Purpose: To protect the wall from damage caused by chair backs.
- Modern Use: Primarily decorative. It is used to visually divide a wall, often allowing for two different paint colors, wallpapers, or materials (e.g., wood paneling below, paint above).
6. Picture Frame Molding (or Panel Molding)
- What it is: Thin, decorative strips of molding applied to the wall to create rectangular or square “frames.”
- Purpose: To create a sophisticated, paneled look on the upper part of a wall. It adds architectural interest and a sense of custom craftsmanship. It’s a classic way to create a feature wall without the cost of full wood paneling.
7. Batten
- What it is: A narrow strip of wood, often with a rectangular profile.
- Purpose: In traditional use, battens were used to cover the seams between vertical boards in board and batten siding or wainscoting. Modern uses include creating geometric wall designs, vertical accents, and a craftsman or farmhouse style.
8. Crown Molding (or Cornice)
- What it is: Molding that is installed in the seam where the wall meets the ceiling.
- Purpose: To create a graceful, finished transition between the wall and ceiling. It adds grandeur, can make ceilings appear higher, and gives a room a polished, architecturally significant look. Profiles can range from simple to extremely ornate.
9. Cove Molding
- What it is: A type of crown molding with a simple, concave profile.
- Purpose: It creates a soft, scooped transition between surfaces (like wall-to-ceiling or wall-to-cabinet). It is generally simpler and less ornate than traditional crown molding.
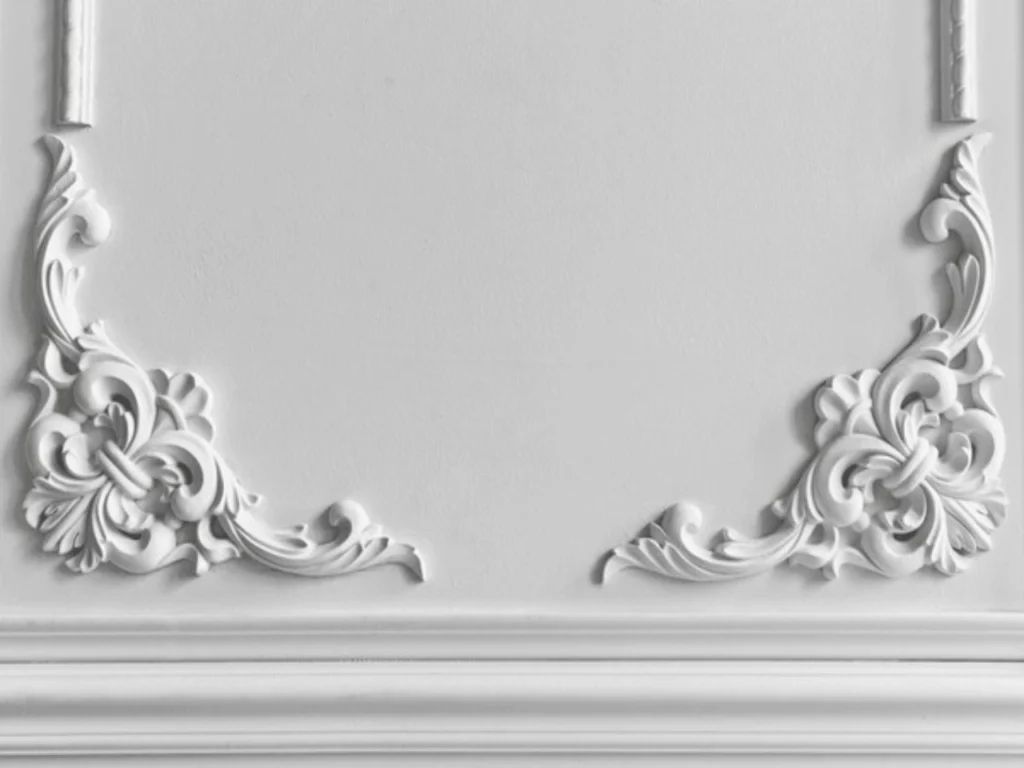
10. Dentil Molding
- What it is: A decorative molding characterized by a repeating pattern of small, block-like teeth, resembling a row of teeth (hence the name, from the Latin dens).
- Purpose: Purely ornamental. It is most commonly found as part of a detailed crown molding or cornice in traditional, Georgian, or Federal-style architecture.
11. Casing
- What it is: The molding that frames a door or window opening.
- Purpose: To trim around doors and windows, covering the gap between the door/window frame and the wall. It provides a finished look and can be a major style element in a room.
Choosing the Right Material for Your Decorative Wall Molding
1. MDF (Medium-Density Fiberboard)
The Modern, Budget-Friendly Workhorse
- What it is: An engineered wood product made from compressed wood fibers and resin. It comes pre-primed and smooth.
- Pros:
- Affordable: Significantly cheaper than solid wood.
- Smooth & Consistent: Has no grain, knots, or imperfections, providing a perfect surface for painting.
- Easy to Work With: Softer than wood, making it easier to cut with standard tools (though wear a mask for the dust).
- Stable: Resistant to warping and shrinking under normal conditions.
- Cons:
- Moisture-Sensitive: Will swell and be ruined if it gets wet. Not suitable for bathrooms, kitchens, or high-humidity areas.
- Dents Easily: The edges are particularly vulnerable to chipping and denting from impact.
- Cannot Be Stained: The manufactured look doesn’t take stain well; it is meant to be painted.
Verdict: The best all-around choice for most DIYers for dry, interior rooms where you plan to paint the molding.
2. Polyurethane (Foam)
The Lightweight, Ornate Option
- What it is: A rigid, lightweight foam that is molded into intricate profiles.
- Pros:
- Very Lightweight: Easy for one person to handle and install, even for large crown molding.
- Easy to Cut & Install: Can be cut with a utility knife or fine-tooth saw. Adheres easily with construction adhesive.
- Budget-Friendly for Ornate Styles: Replicating intricate wood or plaster designs in polyurethane is extremely cost-effective.
- Moisture-Resistant: Won’t rot or warp from humidity, making it a better choice than MDF for some rooms.
- Cons:
- Can Be Damaged: Vulnerable to dings, punctures, and damage from impact.
- Must Be Painted: Requires a thick, high-quality primer and paint to hide the synthetic foam texture.
- Can Look “Cheap”: If not painted properly, the lightweight feel can seem less substantial than wood.
Verdict: Ideal for achieving a high-drama, ornate look on a tight budget or for DIYers who want to avoid heavy lifting.
3. Wood
The Classic, High-End Choice
- What it is: Solid lumber, typically pine or poplar, though more expensive hardwoods are available.
- Pros:
- Durable & Strong: Withstands impact and can be repaired and refinished easily.
- Beautiful Finish: Can be stained to show off the natural wood grain or painted for a classic, hard-wearing finish.
- Adds Value: Considered a premium, high-quality material that appeals to homebuyers.
- Versatile Profiles: Can be custom-milled into virtually any shape.
- Cons:
- Expensive: The material cost is the highest of the common options.
- Requires More Skill: Can be difficult to cut and install, especially for complex corners (coping). Prone to splitting.
- Potential for Warping: Wood can expand, contract, warp, or split with changes in humidity and temperature.
Verdict: The best choice for purists, historic homes, high-traffic areas, or when you want the option to stain the wood.
4. PVC / Polystyrene
The Moisture-Resistant Solution
- What it is: A plastic polymer molded into molding profiles. Polystyrene is a specific type of plastic foam, often less dense than polyurethane.
- Pros:
- 100% Waterproof: Will not rot, warp, or swell. The top choice for bathrooms, kitchens, laundry rooms, and basements.
- Easy to Install: Lightweight and easy to cut, similar to polyurethane.
- Insect & Rot Proof: Ideal for areas prone to moisture or pests.
- Cons:
- Limited Styles: Often comes in simpler, more modern profiles rather than highly ornate ones.
- Can Look Synthetic: Has a plastic feel and must be painted.
- Not as Rigid: Some lower-density polystyrene options can be too flexible for large spans.
Verdict: The undisputed winner for any high-moisture application where you want the look of molding without the risk of water damage.
5. Plaster
The Ultimate High-End, Custom Option
- What it is: Traditional plaster that is either cast in molds or run on-site by a skilled craftsman.
- Pros:
- Unmatched Elegance: Allows for seamless, smooth, and highly intricate custom designs you can’t get with other materials.
- Very Durable: Once set, it is hard and long-lasting.
- Seamless Look: Can be run on-site for continuous lengths without visible seams.
- Cons:
- Very Expensive: High material and even higher labor costs.
- Professional Installation Required: Requires a specialized plasterer, making it a non-DIY option.
- Heavy and Fragile: Difficult to handle and can crack from settling or impact.
Verdict: Reserved for high-end new construction, major renovations, or historic restorations where budget is not the primary concern.
How to Choose
- What’s Your Budget?
- Tight Budget: MDF or Polyurethane.
- Healthy Budget: Wood.
- Unlimited Budget: Plaster.
- Where is it Going?
- Dry Living Room/Bedroom: MDF, Wood, or Polyurethane.
- Bathroom/Kitchen: PVC or Polyurethane.
- Historic Home: Wood or Plaster.
- What’s Your Skill Level?
- DIY Beginner: Polyurethane or PVC.
- Confident DIYer: MDF.
- Experienced Woodworker: Wood.
- Hiring a Pro: All options, including Plaster.
- What’s Your Desired Finish?
- Planning to Paint: MDF, Polyurethane, or PVC.
- Want to Stain: Wood only.
By answering these questions, you can easily narrow down the best material to bring your decorative wall molding vision to life.
Modern Style & Design Inspiration
Gone are the days when molding was solely associated with stuffy, traditional interiors. Here’s how to use molding in contemporary spaces:
- The Modern Grid: Use thin, simple panel molding to create large, clean geometric grids on a wall. Paint it the same color as the wall for a subtle, textural effect (a tone-on-tone look) or a contrasting color for a bold, graphic statement.
- Vertical Accents: Board and batten is inherently modern with its clean lines. Running it from floor to ceiling in an entryway or hallway creates dramatic height and interest.
- Asymmetrical Designs: Break the rules! Create a single, large framed panel behind a bed or sofa to act as an architectural headboard or focal point.
- Color Drenching: Paint your molding, walls, and ceiling the same deep, saturated color. This creates a cozy, immersive, and incredibly modern room where the molding adds texture without visual clutter.
- Statement Ceilings: Use crown molding to create a “ceiling tray” or coffer, then paint the inside of the coffer a contrasting color or wallpaper it for a stunning overhead feature.
The DIY Installation Guide
Installing basic molding like chair rails or picture frame molding is a very achievable DIY project.
Tools You’ll Need: Measuring tape, miter saw (or a hand saw and miter box), level, pencil, nail gun & compressor (or a hammer and finish nails), wood glue, caulk, wood filler, sandpaper, paint.
General Steps for Installing a Chair Rail or Picture Frame Molding:
- Plan and Measure: Sketch your design on paper. For a chair rail, use a level to mark a consistent height around the entire room. For picture frames, measure and mark the exact placement of each box on the wall.
- Prepare the Molding: If using MDF, it’s often easier to prime and paint the molding before installation.
- Cut the Joints:
- For a Chair Rail: Inside corners are typically coped for a seamless fit. Outside corners are cut at 45-degree miter joints.
- For Picture Frames: Cut your molding at 45-degree angles to form perfect miters for each rectangle or square. A miter saw is essential for clean, precise cuts.
- Install: Apply a thin bead of construction adhesive to the back of the molding. Press it firmly into place on the wall, then secure it with finish nails, driving them into the wall studs where possible.
- The Magic of Finishing:
- Fill: Use wood filler to cover all nail holes and any gaps at the joints. Sand smooth once dry.
- Caulk: Run a thin, continuous bead of paintable latex caulk along the top and bottom edges where the molding meets the wall. This is the single most important step for a professional, built-in look. Smooth with a damp finger or tool.
- Paint: Do your final paint touch-ups, covering the filled holes and caulk lines.
When to Call a Professional: For complex crown molding installations, high ceilings, or if you are using expensive solid wood, hiring a professional carpenter or installer is often worth the investment.
Maintaining Your Decorative Wall Molding
Regardless of material, a regular dusting routine is the single most important thing you can do.
- Regular Dusting: Use a soft, clean, dry cloth (like a microfiber cloth) or a soft-bristled duster (lambswool is ideal). Gently run it along the top and side profiles of the molding.
- Why: Dust and cobwebs accumulate in the grooves and on top of moldings like crown and chair rails. Regular removal prevents grime from building up and becoming harder to clean.
- Gentle Cleaning (When Needed): For smudges or light grime, use a slightly damp (not wet) cloth. Wring it out thoroughly.
- Technique: Wipe the molding gently and then immediately dry it with a separate, soft, dry cloth. This prevents moisture from seeping into the material, which is especially crucial for MDF and wood.
- Avoid Harsh Chemicals: Never use abrasive cleaners, scouring pads, or strong solvents like ammonia or bleach-based products. They can damage the finish, paint, or the material itself. A small amount of mild dish soap in water is sufficient for tough grime.
Conclusion
Decorative Wall Molding is more than just trim; it’s an expression of style and an investment in your home’s character.
It has the unique power to transform bland drywall into a dynamic canvas of shadows and lines, creating a space that feels intentional, curated, and deeply personal.
Whether you start with a simple picture frame molding in your dining room or embark on a full board-and-batten feature wall, the result will be a home that feels more architectural, more polished, and infinitely more inviting.